
Quick Build Series Electric Gondola Kit
(Quick Build Short Kit for electric motors)
$85.00 plus shipping
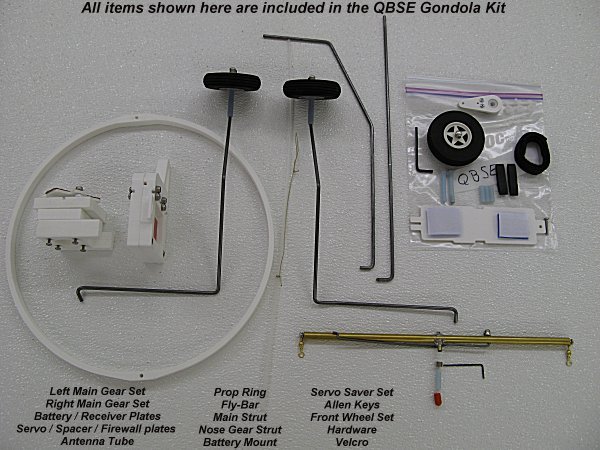
The QBSe kit includes the following
3) 2 3/4" Lite Wheels (installed)
Double sided foam tape (use to installed battery, receiver and ESC)
2) Heat Shrink Tubing (use to secure the ESC if the ESC your using can be covered with shrink wrap tubing. You make the call based on your ESC.)
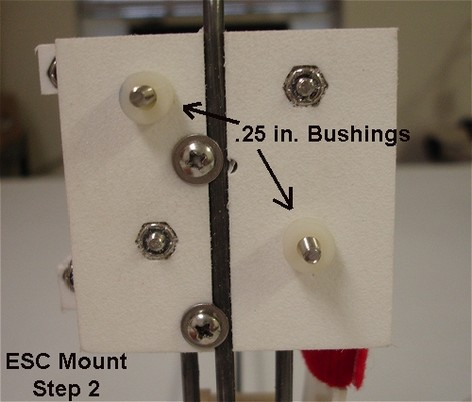
2) Nylon bushing (these rest between the firewall and ESC plate on the 2.5" 6/32 screws)
3) 1/2" wide Velcro straps (use to secure battery and receiver)
Stainless steel Hardware Package (6/32 Machine screws, Washers and Nylon lock nuts)
5/32" Pre-bent wire frame parts
Pre-built fly-bar with bushings, steering linkage and brass swivels installed
CNC machined Plastic and PVC parts (battery & receiver frame plates, prop ring, battery mount plate, firewall, servo mount, spacer and ESC mount plate)
1) 5/32" wheel collar
Antenna tube and mounting screws
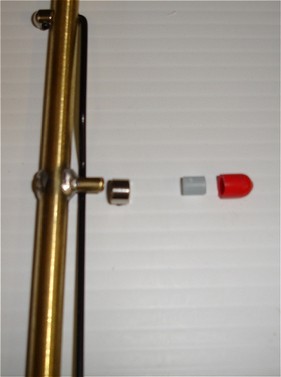
Fly-bar hardware (1)7/8" long fuel tubing, 1)1/4" long fuel tubing, 1)rubber cap)
Lower prop ring hardware (1)7/8" long fuel tubing)
Tools needed to build the kit
9/64" Drill bit to drill out your motor mount for the 6/32 machine screws to pass through
1/16" Allen wrench (included in kits shipped after 7/4/07)
7/64" Allen wrench (included in kits shipped after 7/4/07)
# 1 Phillips Screwdriver
# 2 Phillips Screwdriver
5/16 Wrench
Hammer
Small block of wood ( IE 6" piece of 2x4)
~~~~~~~~~~~~~~~~~~~~~~~~~~~~~~~~~~
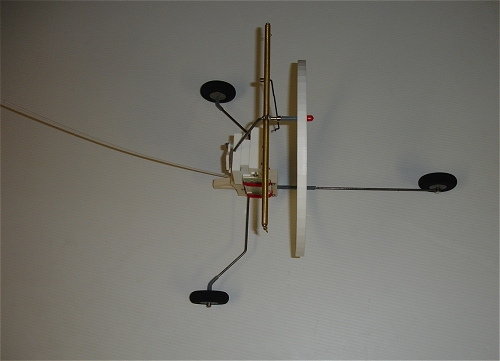
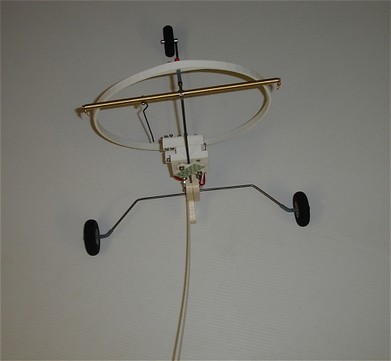
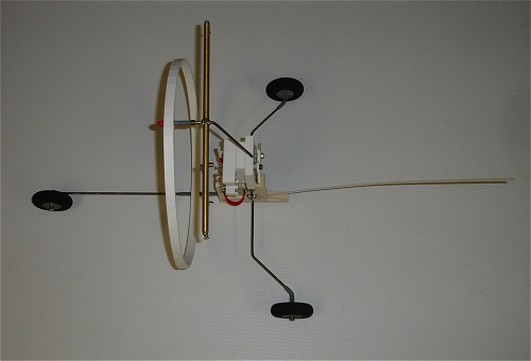
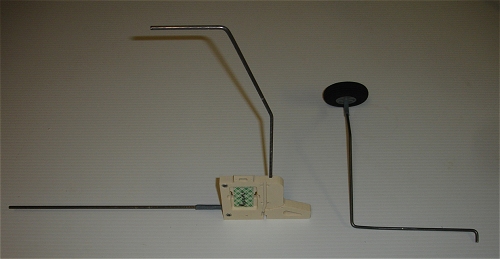
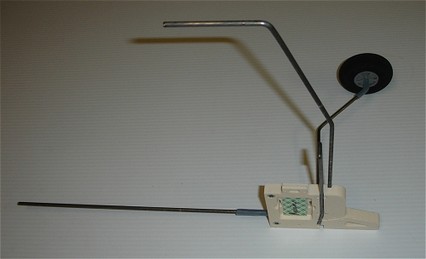
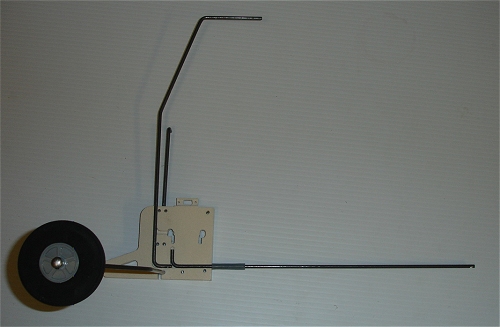
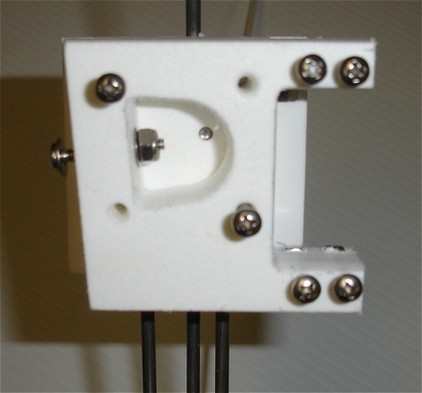
Here is a look at what the QBSE Gondola looks like when built from the kit.
Parts Necessary To Complete The Gondola
(Provided By Customer)
You will need the following items to complete a QBSE gondola kit to have it ready to fly.
1) 2 channel Aircraft radio system with 1 standard size high torque servo (any radio system having at least 2 channels is suitable)
1) Lipo 5000 mAh 3cell 11.1 v 40C (Any 3 cell 3500 mah 40C and up battery will work but will offer shorter flight times)
1) Brushless Motor: AXI 2820-10 or the Turnigy D3542/5 1250KV Brushless Outrunner Motor
(NOTE: A Phasor 15-3 "inrunner type" motor can also be mounted using a Dave brown engine mount you provide. Here is how.)
(NOTE: A Phasor 15-3 "inrunner type" motor can also be mounted using a Dave brown engine mount you provide. Here is how.)
(You can use about any brushless motor setup that provides about the same power as a .40 size glow engine)
1) 40 amp Electric Speed Controller with a BEC
1) I suggest a APC 10x7e Thin Electric prop on the Axi motor and a APC 10X5e Thin Electric prop on the Turnigy motor
Note: the reason for the different prop sizes is that the Axi motor is a 1000Kv motor where as the Turnigy motor is a 1250 Kv motor
Note: the reason for the different prop sizes is that the Axi motor is a 1000Kv motor where as the Turnigy motor is a 1250 Kv motor
1) lipo Battery Charger
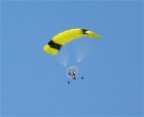
82" Sea Breeze Parachute www.seabreezeparachutes.com
Helpful Links
ESC Programming Card Information
http://www.seabreezeparachutes.com/Quick-Build-Series/qbselectric/cardsetup.wmv
Lipo Battery Information Shared
http://www.seabreezeparachutes.com/lipo-info.wmv
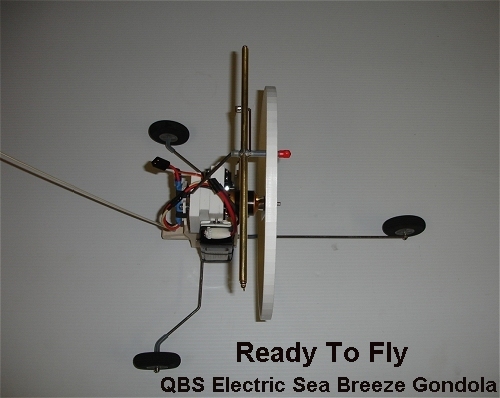
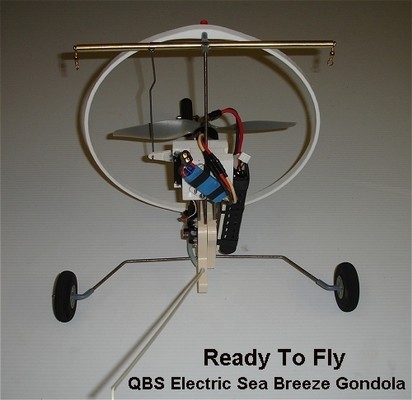
After you have installed your radio system, motor, prop, esc
and battery the QBS Electric Gondola is ready for the parachute.
Test Flight Data
The QBS Electric Gondola setup as noted above offers me 20 minute flight times at best. But, knowing what I know about Lipo batteries, I now fly 12 minutes as not to take my 3 cell 11.1 volt lipo battery below 11.1V. Not going below 11.1 on a 3 cell lipo can double the life of the battery. The 3 cell lipo has more than enough power.
The extra power could be used if flying a small camera or dropping a payload such as a free flight paratrooper.
The QBS Electric kit weighs 1 lb 6 oz. When completed with motor, prop, radio, ESC and battery it weighs 2 lb 13 oz.
The 82" parachute fly's really well at this weight.
Many test flight videos can be seen using the following URL:
http://www.seabreezeparachutes.com/QBSE-videos.html
Kit Building Information
2008 ANTENNA UPDATE
~~~~~~~~~~~~~~~~~~~~~~~~
Have you ordered a QBSE Kit?
2010 QBSE UPDATED BUILD VIDEO
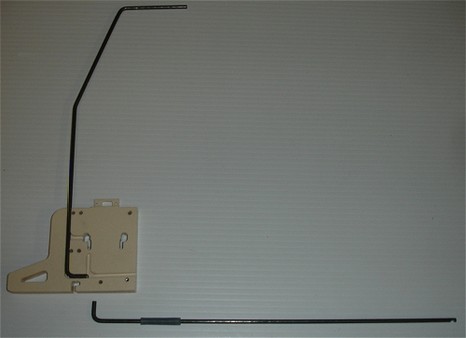
The images below show how the QBS Electric Gondola is built.
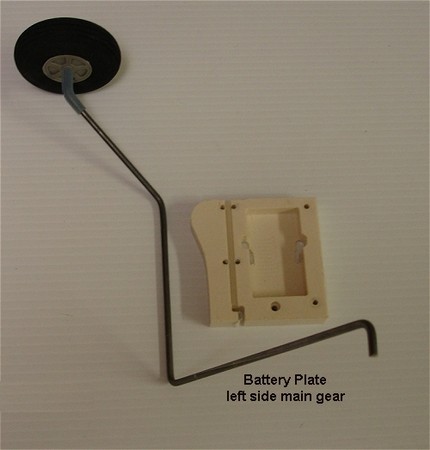
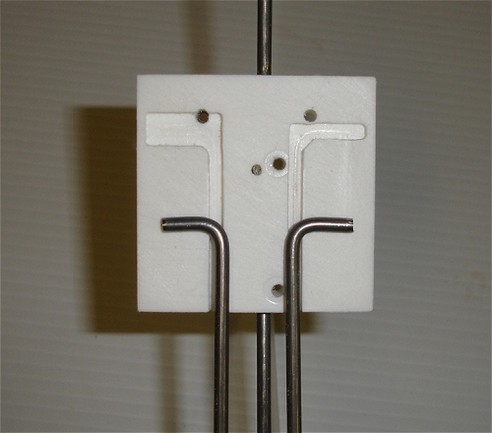
Step 1
Place the left main gear in the battery plate as shown.
More details for this step can be found using the links below
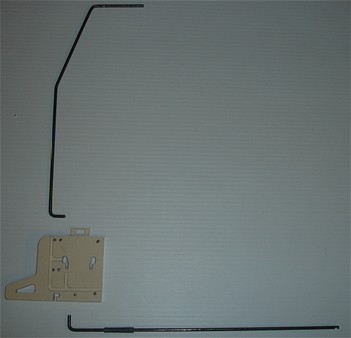
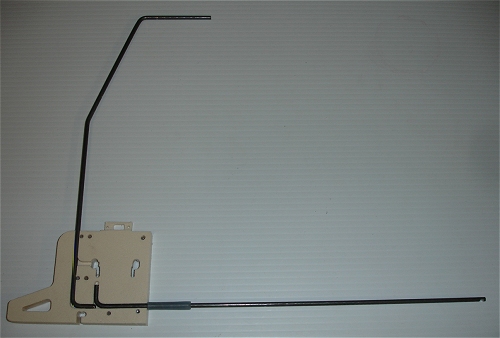
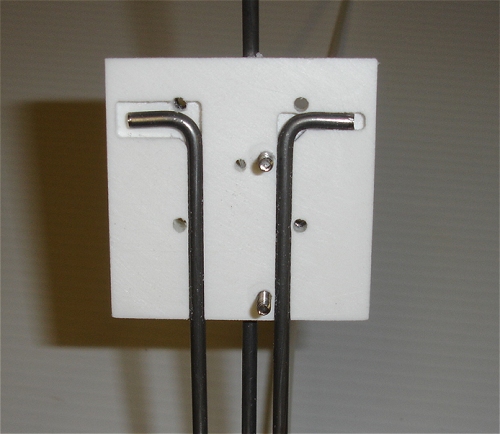
Step 2
Place the right side main landing gear, receiver plate, nose gear strut and the main strut.
Put these parts together as shown below.
More details for this Step can be found using the links below
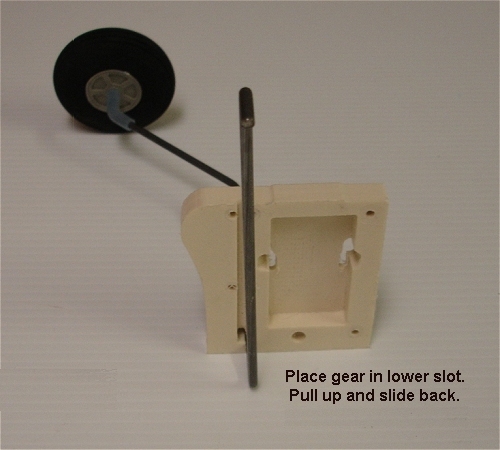
Step 3
Align the main gear in the bottom notches and rotate the plates so they match.
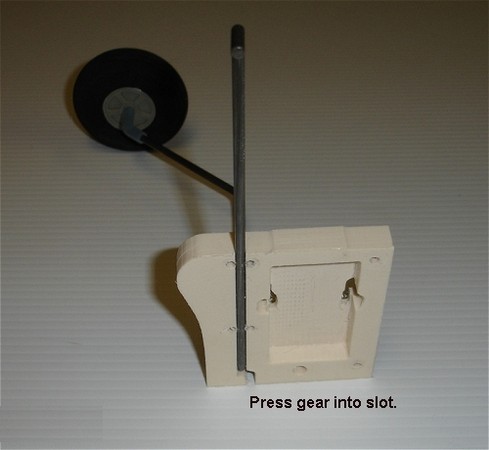
Then place the two 1" screws with flat washers as shown.
Then install the four 1 1/4" screws to hold the wire in the slots.
More details for this Step can be found using the links below
HTML Version http://www.seabreezeparachutes.com/Quick-Build-Series/qbselectric/qbsebuidstep3.html
PDF Version http://www.seabreezeparachutes.com/Quick-Build-Series/qbselectric/qbsebuildstep3.pdf
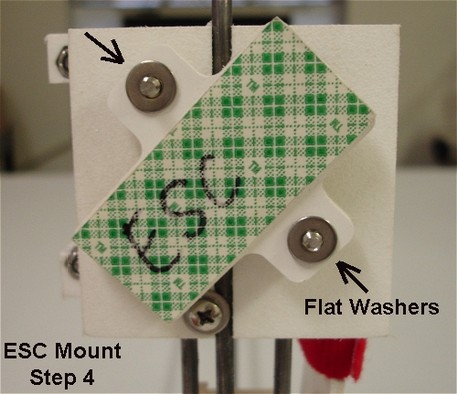
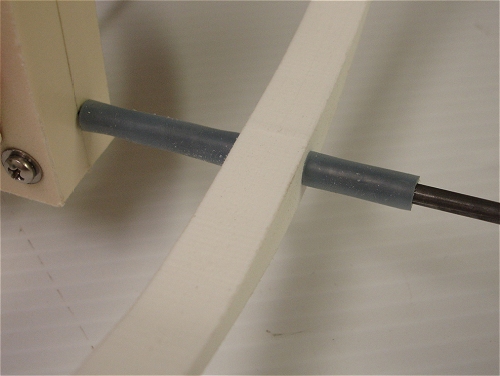
Step 4
Install the firewall by putting it in place and sliding it down until the wire on the right fits into the small slot as shown.
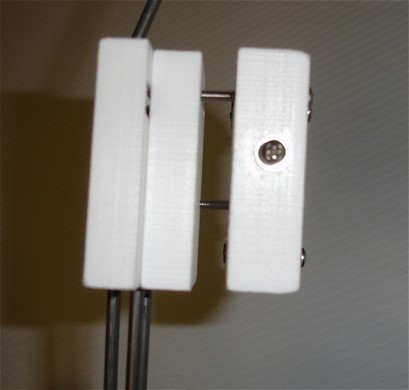
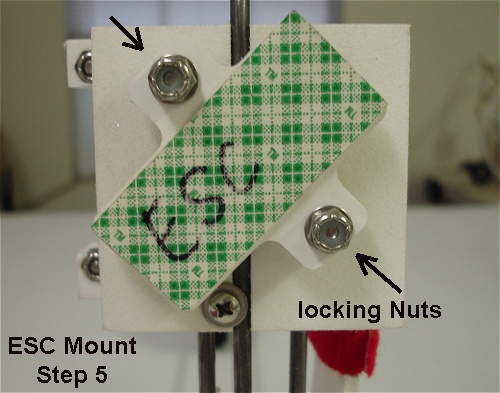
Step 5
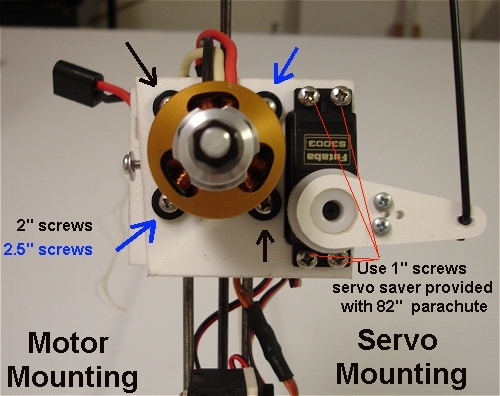
Add the servo mount using two 2" screws so, the battery plate fit can be checked before the motor is installed.
Step 6
Install the spacer using two 1" screws with flat washers.
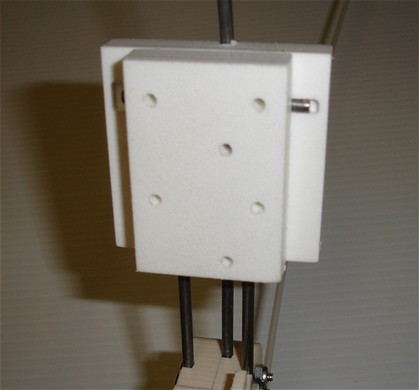
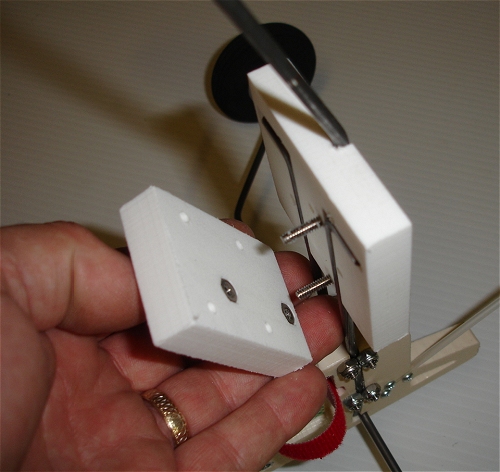
Step 7
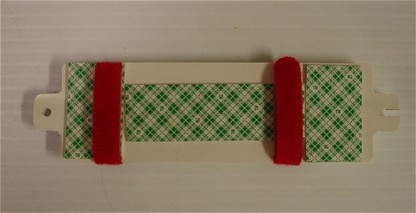
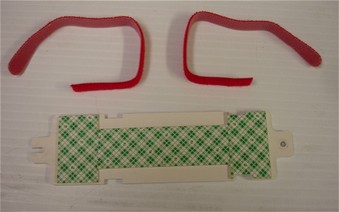
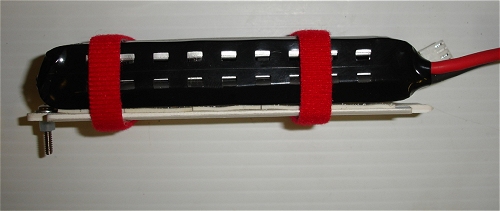
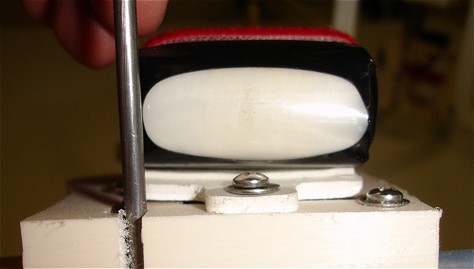
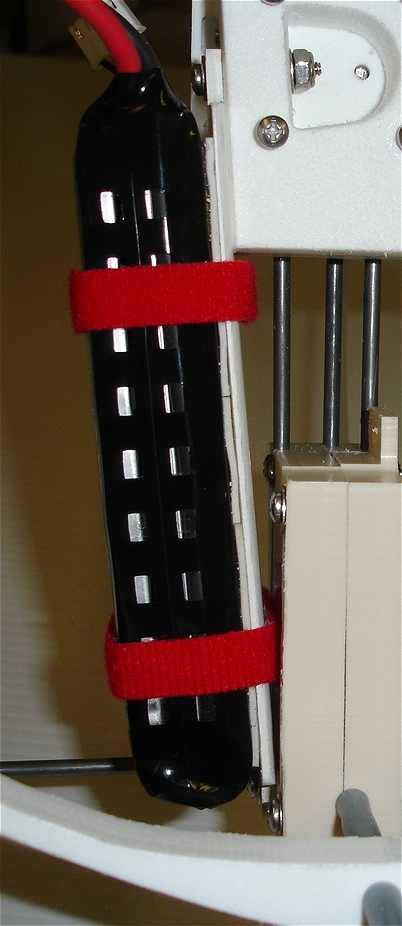
Mount the battery plate to the battery using the provided double sided tape and Velcro straps.
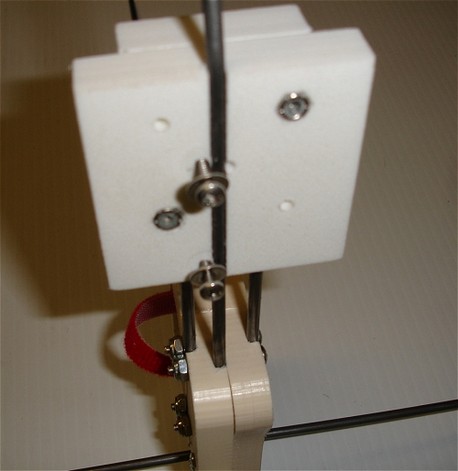
Step 8
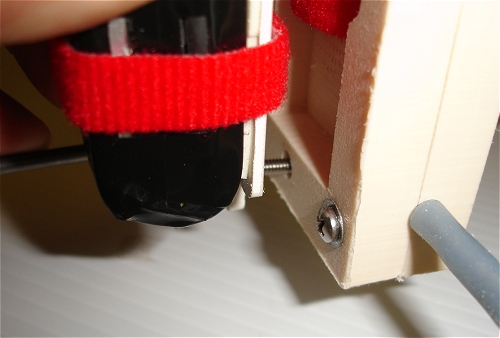
Insert the two 2.5" screws in the remaining holes of the servo plate. Then check the fit as the upper battery plate tab is inserted under the screw and flat washer on the side of the servo mount. Adjust the screw if needed.
Please note: This screw can not be adjusted after the motor is installed.

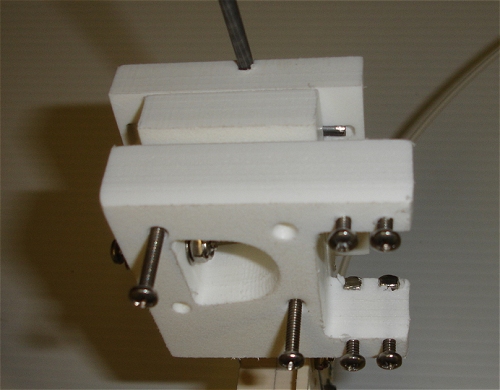
Step 9
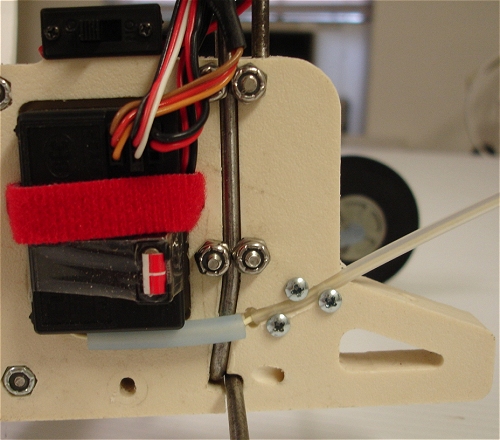
Next you will need to install the ESC mount. Locate your motor and the parts shown below.
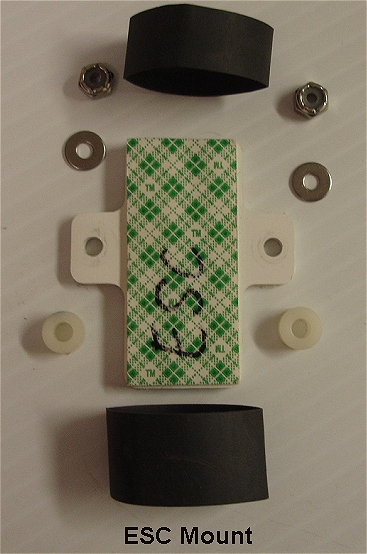
You may need to drill out your mount for the 6/32 screws to pass through.
Place the screws through the motor mount and through the servo mount as shown.
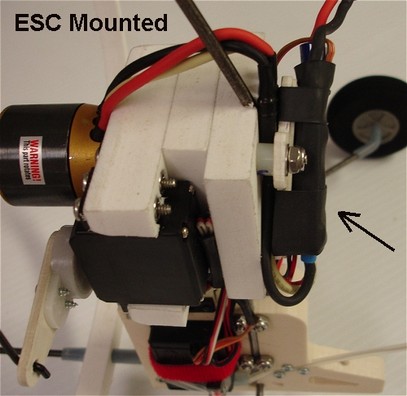
Step 10
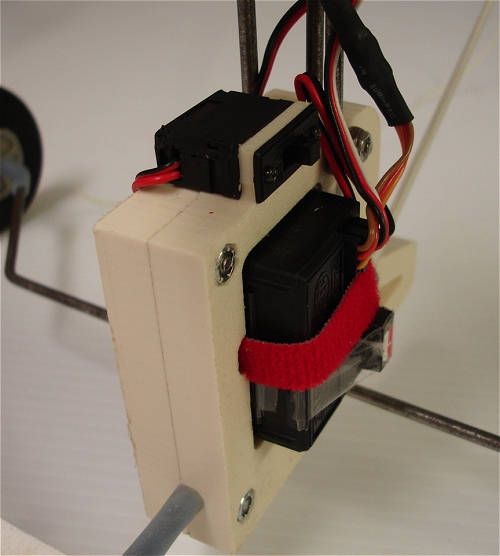
Install the ESC mount as shown below.

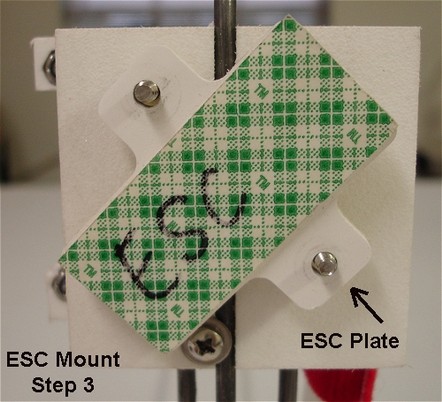
Here is a look after the ESC has been installed using the double sided tape and heat shrink tubing.

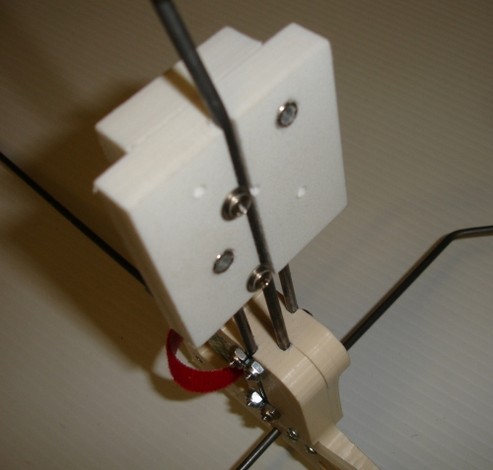
Step 11
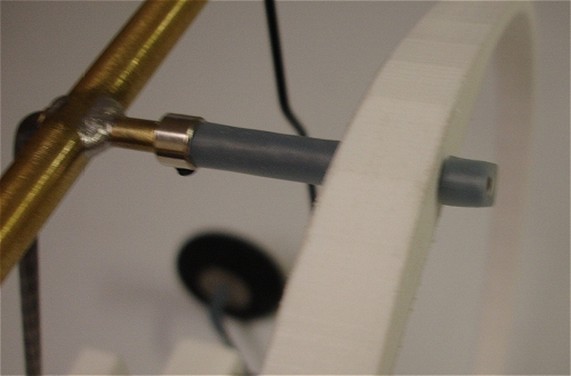
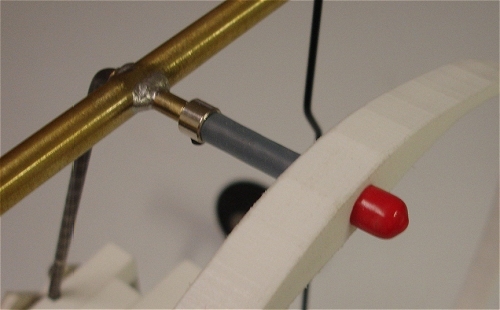
Locate the prop ring hardware and fly-bar then, install the fly-bar and prop ring as shown below.
Step 12
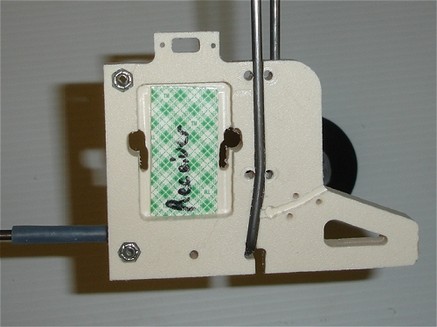
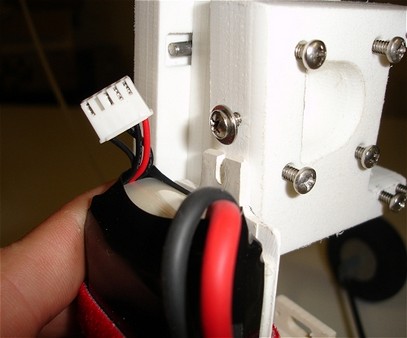
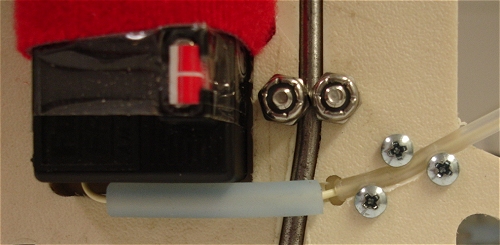
Install the antenna using the three small screws provided. The receiver is mounted using the provided double sided tape and Velcro strap. Mount the switch, nose wheel and prop.
~~~~~~~~~~~~~~~~
Building Notes
Be sure and put tape around the receiver to secure the crystal in the receiver.
I have also added a small piece of 1 3/8" long fuel tubing over the antenna wire.
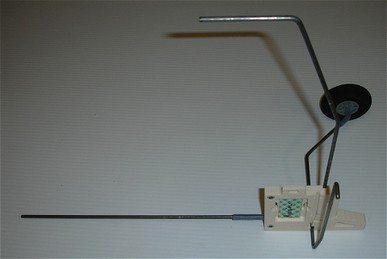
Take a look at your gondola and things should be square.
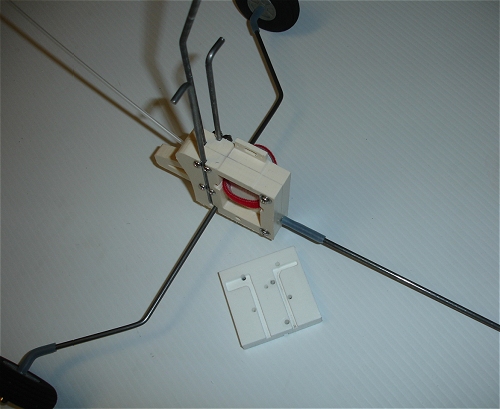
Check the view looking from the top down. The prop and fly-bar should be parallel and 90 degrees to the nose gear strut.
The prop ring should be adjusted forward or back so the prop is located inside the prop ring.
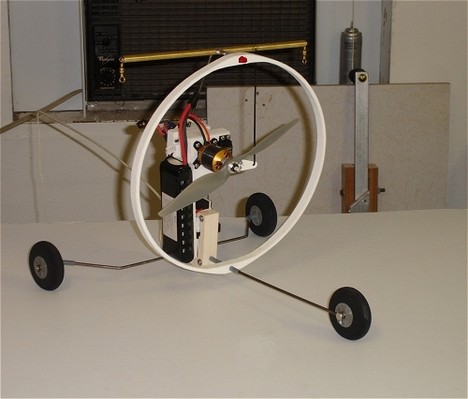
Test Flight Images
(82" Parachute not included in the QBS Electric Kit)
QBS Electric Kit Pricing
QBSE kit $85.00 plus shipping
QBSE Kit / Parachute Combo
QBSE kit with 82" Sea Breeze Parachute (up to 3 colors) $275.00
By Phone: 941 730-4336 (anytime)